❤️ MỘT CÁI PIZZA LƯỜI DÀNH CHO NHỮNG NGƯỜI CHĂM CHỈ - A LAZY PIZZA FOR HARD-WORKING PEOPLE 😂
Gọi là lười vì trong nhà có gì C dùng nấy, chứ cũng ko ra đường mua gì cả =)))
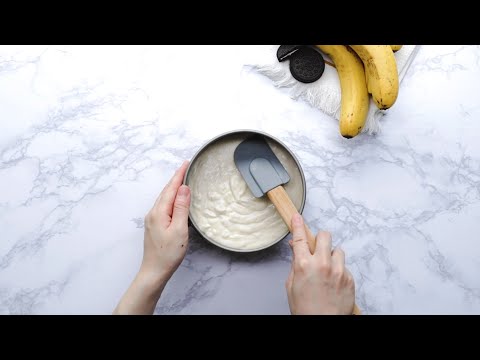
Công thức bột trên ảnh, nhanh mà dễ làm 😚
Xốt cà chua tùy ý, nhà còn gì cho nấy, nhưng nếu muốn ngon thì nên là có 1/2 củ hành tây, 1 tép tỏi băm, 2 quả cà chua, xíu đường, muối tiêu, chút lá oregano hoặc basil. Nấu lên, đừng cho nước, để nó đặc chút, để nguội, xay ra chứ đừng lười như C 🤣
Topping theo sở thích nhé, thái các thứ thành miếng nhỏ thôi cho nhanh chín. Bột thì sau khi trở về nhiệt độ phòng rồi, mn đem cán ra, mỏng dày tùy ý, thích ngựa ngựa như C làm viền cũng đc 😂 Bỏ sốt, topping lên r nướng thôi.
Nướng 250°C nếu lò lên đc nhiệt cao hơn thì mn nướng 270-280°C nhé, tùy lò tầm 7-10p là xong rồi :> Còn cái này là kinh nghiệm nè, C dùng tấm silicone thành ra mặt dưới nó ko đc xém thơm, mn nên sử dụng khay đen của lò, phủ bột lên chống dính nhé, để đc hấp thụ nhiệt tốt hơn, bánh có màu đẹp và ăn ngon hơn.
-----
We called it lazy, cuz we only use what I have in my fridge 😅
The dough recipe is on the pics, easy peasy!
Sauce of your choice, I used what I had. But I have a better recipe : half an onion, 1 clove of garlic, 2 ripe tomatoes, a pinch of sugar, salt & pepper, oregano or basil up to you. Cook them, make the sauce a little bit thick, don't put water. Blend it, you should, I was such a lazy ass 🤦
Toppings of your choice, cut them a little bit small so they can be cooked through in the oven. Let the dough rest in room temp, then you can use it, stretch it, roll it with a rolling pin, any ways or shapes you prefer. Put the sauce, toppings, cheese then let's bake it 🙌
250°C in 7-10mins, better at 270-280°C if your oven can go up that much. In my experience, you should use the oven tray, like the black ones, (remember to put flour to prevent the stickiness) so the dough can be cooked more. Mine I used the silicone mat, so it was not as golden as I wanted it to be :<
#homemade #madefromscratch #seafood #pizza #homemadepizza #quarantine @ Ở_Nhà_Chứ_Ở_Đâu ^_^
同時也有7部Youtube影片,追蹤數超過60萬的網紅Tasty Japan,也在其Youtube影片中提到,みんな大好きなチーズケーキのご紹介です! 見た目もかわいくクッキーアンドクリームをトッピングにして、スティック状にアレンジ♡ バレンタインのプレゼントにもおすすめです♪ とっても簡単なレシピです!ぜひ作ってみてくださいね♪ 簡単スティックチーズケーキ 15cm角型 1台分 材料: ■ボトム ココ...
「what is cheese rolling」的推薦目錄:
what is cheese rolling 在 Miss Tam Chiak Facebook 的最讚貼文
Annyeonghaseyo! K-fever never ends, and Korean cuisine has never been hotter. Singaporeans’ love for awesome Korean food just never dies. Masizzim Singapore’s menu centers itself on mouthwatering stews, DIY riceballs and lip-smackingly tasty sides.
Masizzim’s stews come with Spicy Chicken, Pork Ribs, or Beef Ribs. The meats are first marinated overnight, then carefully slow-cooked for 6 hours until tender. Yum. The stew contains a good mix of fall-off-the-bone tender meat, tteokbokki, onions, sliced king oyster mushrooms, and slippery glass noodles, and a generous sprinkling of freshly cut leeks.
We had fun rolling the Tuna Riceball, and boy were the spheres tasty! The combination of multigrain rice, tuna and kimchi really had me hooked. What a flavour bomb! The gooey Honey Mustard Cheese Egg Roll is not to be missed either. Cheese lovers will swoon over this one, just check out the cheese pull! Egg and cheese just can’t go wrong, and Masizzim has certainly nailed this creation.
If you're wary of dining out these days, though, don't forget that Masizzim is on Deliveroo, GrabFood and foodpanda!
Continue reading at Miss Tam Chiak: https://www.misstamchiak.com/masizzim-daebak-set-2019/
Address: 313 Orchard Rd, 313@Somerset #B3-02, Singapore 238895
Tel: 6509 5808
✅ Get first dibs on our food recommendations the very moment it gets published on our website - join us on our Telegram group: https://t.me/misstamchiak!
what is cheese rolling 在 Tasty Japan Youtube 的精選貼文
みんな大好きなチーズケーキのご紹介です!
見た目もかわいくクッキーアンドクリームをトッピングにして、スティック状にアレンジ♡
バレンタインのプレゼントにもおすすめです♪
とっても簡単なレシピです!ぜひ作ってみてくださいね♪
簡単スティックチーズケーキ
15cm角型 1台分
材料:
■ボトム
ココアビスケット 100g
溶かしバター(無塩)20g
牛乳 大さじ2
■フィリング
クリームチーズ(室温に戻す) 200g
砂糖 60g
生クリーム 100ml
卵 2個
コーンスターチ 大さじ2
レモン汁 大さじ1
バニラエッセンス 適量
ココアビスケット(飾り用)適量
作り方:
1. ボトムを作る。チャック付きの袋にビスケットを入れて口を閉め、麺棒などで叩いて細かく砕く。ボウルに入れて、溶かしバターと牛乳を加えて、混ぜる。
2. 紙をしいた型に(1) をしきつめてスプーンで強く押さえたら、冷蔵庫に入れて冷やし固める(約30分)。
3. オーブンは170℃に予熱しておく。
4. ボウルにクリームチーズを入れ、ゴムベラで練ってほぐす。
5. 生クリームと砂糖を入れてハンドミキサーで混ぜる。
6. 溶き卵を2回に分けて加え、その都度よく混ぜる。
7. コーンスターチ、レモン汁、バニラエッセンスを加えて混ぜたら、(2) の型に流しし入れ、型ごと台に2-3回打ちつけて空気を抜く。
8. 飾り用のココアビスケットを手で砕いて、生地の表面に差し込むようにのせたら、170℃に予熱したオーブンで40-50分焼く。
9. 焼き上がったら竹串をさしてみて、ドロっとした生地がついてこなかったら型に入れたまま粗熱をとり、さらに冷蔵庫で6時間〜一晩冷やし固める。
10. 紙を外して、好みの大きさ(動画は5等分)に切り分けたら、完成!
Here is what you'll need!
Super rich! Biscuit cheesecake bars
Servings: 1 loaf pan (15cm)
INGREDIENTS
◆Crust
100g cocoa biscuits
20g melted butter (unsalted)
2 tablespoons milk
◆Filling
200g cream cheese (at room temperature)
60g sugar
100ml heavy cream
2 eggs
2 tablespoons corn starch
1 tablespoon lemon juice
Some vanilla extract
Some cocoa biscuits (for toppings)
PREPARATION
1. To make crust, crush biscuits in a zipped top bag with a rolling pin. Mix crushed biscuits with melted butter and milk in a bowl.
2. Line a loaf pan with a parchment paper, press crushed biscuits (1) down into the bottom of the pan with a spoon. Refrigerate for 30 minutes.
3. Preheat the oven to 170˚C (335˚F).
4. In a bowl, stir cream cheese with a rubber spatula until smooth
5. Add heavy cream and sugar into the bowl and mix.
6. Add beaten eggs. (One egg at a time, make sure to mix well each time you add the egg.)
7. Add corn starch, lemon juice, and vanilla extract. Mix well and pour into the loaf pan (2). Drop the pan on the kitchen counter a couple of times to remove air.
8. Break cocoa biscuits (for toppings) and place on top. Bake for 40 to 50 minutes.
9. The cake is done if a toothpick inserted in the center comes out clean. Let cool. Refrigerate for 6 hours.
10. Remove from the pan. Slice as you like.
11. Enjoy!
#TastyJapan
#レシピ
MUSIC
Licensed via Audio Network

what is cheese rolling 在 Tasty Japan Youtube 的最讚貼文
中はホクホク、外はサクサクの美味しいかぼちゃコロッケのレシピです♪
挽き肉と玉ねぎをかぼちゃに混ぜて、中にはチーズを入れ、揚げ衣にはグラノーラを使ってサクサクに!
食感も楽しめる絶品コロッケレシピ、ぜひ作ってみてくださいね♫
かぼちゃを使ったサクサクコロッケ
2人分
材料:
かぼちゃ(皮を削ぎ落とし、ひと口大に切る) 300g
合い挽き肉 100g
玉ねぎ(みじん切り) 1/2個
バター 10g
塩 少々
コショウ 少々
ピザ用チーズ 40g
■衣
薄力粉 適量
溶き卵 1個分
グラノーラ* 適量
揚げ油 適量
*グラノーラはフルーツの入っていない、甘さ控えめのものがおすすめです。
作り方:
1.ボウルにかぼちゃを入れ、ふんわりラップをかけて600Wの電子レンジで6分加熱する。熱いうちにつぶし、粗熱を取る。
2. フライパンにバターを入れて中火にかけ、バターが溶けたら玉ねぎを加えて炒める。透き通ってきたらひき肉を加えて炒め、塩、コショウで調味し、火からおろして粗熱を取る。
3. (2)を(1)に加えてよく混ぜる。生地をすくって中心にピザ用チーズを入れ、ピンポン玉くらいのボール状に丸める。同様に10~12個作る。(柔らかい場合は冷蔵庫で10分ほど冷やし固める。)
4.ジップ付きのポリ袋にグラノーラを入れ、めん棒で叩いて細かく砕く。
5. (3)を小麦粉、溶き卵、(4)の順につけ、衣がはがれないようにぎゅっと丸める。
6. 170℃の揚げ油に入れ、きつね色になるまで2-3分揚げたら、完成
===
Here is what you'll need!
---
Cheese-stuffed Squash croquettes
Servings: 2
INGREDIENTS
300g squash (cut into bite-size pieces, remove skin)
100g ground beef & pork
1/2 onion (diced)
10g butter
A pinch salt & pepper
40g shredded cheese
■Crumbs
Some all-purpose flour
1 beaten egg
Some granola (unsweetened)
Some vegetable oil
PREPARATION
1. Put squash pieces in a bowl, plastic-wrap loosely, and microwave at 600W for 6 minutes. Mash while still hot. Let cool.
2. Melt butter in a pan over medium heat, add onion and stir. Add ground meat, season with salt and pepper, and stir. Remove from the heat, let cool.
3. Add ground meat (2) into the bowl (1) and mix well. Form squash balls and put shredded cheese in the center. Make 10 to 12 balls. (When squash is too soft to form, it helps to refrigerate for 10 minutes.)
4. Crush granola in a zipped top bag with a rolling pin.
5. Dredge each ball in all purpose flour, dip in beaten egg, then crushed granola (4).
6. Heat vegetable oil in a pan to 170℃ (335°F) and place balls. Deep fry for a few minutes until golden.
7.Enjoy!
---
Check us out on Twitter! https://twitter.com/TastyJapan
Check us out on Instagram! https://www.instagram.com/tastyjapan/
#TastyJapan #レシピ
MUSIC
Licensed via Audio Network

what is cheese rolling 在 Tasty Japan Youtube 的精選貼文
チーズケーキのご紹介です!
バナナとチョコ、クッキーアンドクリームの最高な組み合わせ・・♡
甘くて濃厚だけど、チーズがさっぱりとしているのでひたすら食べられちゃいます!
上のガナッシュはお好みのチョコでほろ苦くビターにするのも◎
とっても美味しいのでぜひ作ってみてくださいね♪
生チョコバナナチーズケーキ
15cmケーキ型 1台分
材料:
■フィリング
クリームチーズ(室温に戻す) 200g
生クリーム 150ml
バナナ 1本
砂糖 50g
レモン汁 小さじ2
粉ゼラチン 5g
水 大さじ2
◼︎生チョコレート
チョコレート(砕く) 50g
生クリーム 50ml
◼︎ボトム
クッキーアンドクリーム 12枚
溶かしバター 20g
作り方:
1.ボトムを作る。ジップ付きの袋にクッキーアンドクリームを入れて、めん棒で叩いて細く砕く。溶かしバターを加えてよく揉み込む。クッキングシートを敷いた型の底に敷き詰め、冷蔵庫に入れて30分冷やし固める。
2.フィリングを作る。ボウルにクリームチーズ、砂糖を入れ、なめらかになるまで練り混ぜる。
3.別のボウルにバナナ、レモン汁を入れ、フォークでしっかりとつぶし、(2)に加えて泡立て器で混ぜ合わせる。
4.ゼラチンを水に振り入れてふやかし、600Wの電子レンジで10秒ほど温めて液状にし、フィリングに加えてよく混ぜる。
5.別のボウルに生クリームを入れ、ハンドミキサーで7分立てにする。2回に分けてフィリングに加え、その都度さっくりと混ぜる。
6.(1)の型に流し入れ、表面を平らにならし、冷蔵庫で2-3時間冷やし固める。
7.生チョコレートを作る。ボウルにチョコレート、生クリームを入れ、500Wの電子レンジで1分加熱する。取り出してなめらかになるまでよく混ぜる。(チョコが溶けない場合は10秒ずつ加熱して溶かす。)
8.(7)を(6)の表面に流し入れ、冷蔵庫で3時間冷やし固めたら、完成!
===
Here is what you'll need!
---
Chocolate Ganache Banana Cheesecake
Servings: 1 (15cm cake mold)
INGREDIENTS
■Filling
200g cream cheese (at room temperature)
50g sugar
1 banana (about 85g)
2 teaspoons lemon juice
5g gelatin powder
2 tablespoons water
150ml fresh cream
■Chocolate ganache
50g chocolate (chopped)
50ml fresh cream
■Crust
12 cookies & cream cookies
20g melted butter
PREPARATION
1. To make crust, crush cookies & cream cookies in a zipped top bag with a rolling pin, add melted butter and combine. Line a cake mold with a parchment paper, press crushed cookies down into the bottom of the mold. Refrigerate for 30 minutes.
2. To make filling, mix cream cheese and sugar in a bowl until smooth.
3. In separate bowl, mash a banana with a folk, add lemon juice. Transfer into (2) and mix well with a hand mixer.
4. Sprinkle gelatin powder into the water, microwave at 600W for 20 seconds to liquefy. Pour into the filling (2).
5. In separate bowl, whip cream until soft peaks form. Transfer into the filling, half at a time. Do not over mix but just combine.
6. Pour into the mold (1). Refrigerate for 2 to 3 hours.
7. To make chocolate ganache, put chopped chocolate and fresh cream in a bowl and microwave for 1 minute at 500W. Mix until smooth.
8. Pour chocolate cream (7) into (6). Refrigerate for 3 hours.
9. Enjoy!
---
Check us out on Twitter! https://twitter.com/TastyJapan
Check us out on Instagram! https://www.instagram.com/tastyjapan/
#TastyJapan #レシピ
MUSIC
Licensed via Audio Network
